Mfr Part # SC1227
GRAPHIC DISPLAY TFT RGB 7"
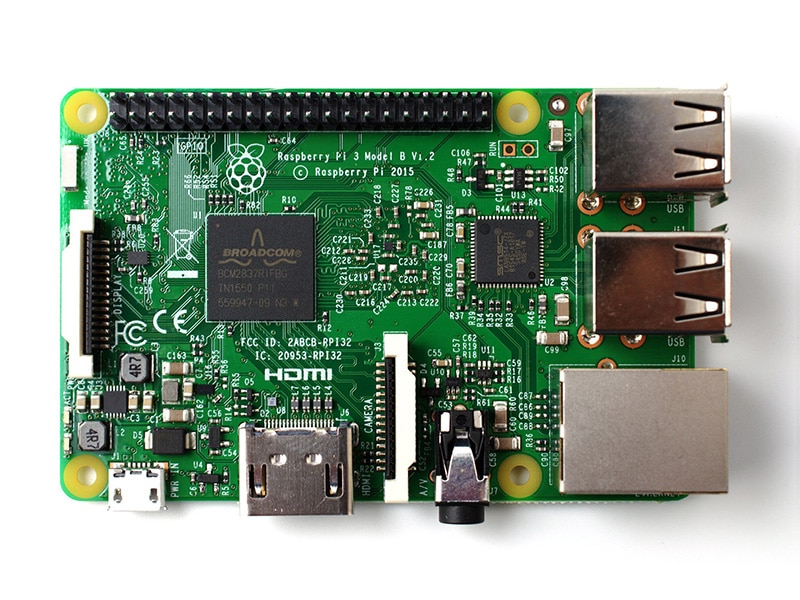
Raspberry Pi
License: See Original Project Single Board Computers Qwiic Raspberry Pi SBC
Guide by bboyho
Pulling the plug on your Raspberry Pi before it safely shuts down... is a bad idea! This can result in a corrupt microSD card and file system. Normally, we can use the menu bar from the GUI or type a command in the terminal window to safely shutdown the Pi. If you are looking for a quicker solution (especially if you are using a headless setup), have no fear! You can safely reboot or shut down your Raspberry Pi using a general-purpose button and a Python script!
To follow along with this tutorial, you will need the following materials. You may not need everything though depending on what you have and your setup. Add it to your cart, read through the guide, and adjust the cart as necessary.
We would also recommend taking a look at the following tutorials if you aren't familiar with them.
Raspberry Pi 4 Kit Hookup Guide
March 14, 2020
Guide for hooking up your Raspberry Pi 4 Model B basic, desktop, or hardware starter kit together.
Qwiic pHAT for Raspberry Pi Hookup Guide
May 23, 2019
Get started interfacing your Qwiic enabled boards with your Raspberry Pi. The Qwiic pHAT connects the I2C bus (GND, 3.3V, SDA, and SCL) on your Raspberry Pi to an array of Qwiic connectors.
Serial Terminal Basics: This tutorial will show you how to communicate with your serial devices using a variety of terminal emulator applications.
Raspberry gPIo: How to use either Python or C++ to drive the I/O lines on a Raspberry Pi.
Python Programming Tutorial: Getting Started with the Raspberry Pi: This guide will show you how to write programs on your Raspberry Pi using Python to control hardware.
How to Run a Raspberry Pi Program on Startup: In this tutorial, we look at various methods for running a script or program automatically whenever your Raspberry Pi (or other Linux computer) boots up.
The connection is quick. If you have not already, simply stack the Qwiic pHAT v2.0 on top of your Raspberry Pi's GPIO header. If you are using an enclosure, you may need to have additional pair of stackable headers for a secure connection. The image below shows the pHAT v2.0 connecting to a Pi 3 with the help of stackable headers.
For the scope of this tutorial, we'll using a desktop setup with a monitor, keyboard, and mouse to easily configure your Raspberry Pi. If you have not already, connect the necessary peripherals and power up your Pi!
For those familiar with the text-based command line, we can shutdown the Pi using the following command.
sudo shutdown -h now
The following example loads a Python script at startup and safely shuts down the Raspberry Pi using that command when the button connected to GPIO17 is pressed.
On your Raspberry Pi, download the Python script by pressing the button below.
Download "safe_shutdown_Pi.py" Here (PY)
You can also copy the code and paste it in a text editor. Just make sure to name this file as safe_shutdown_Pi.py and remember the location that the file was saved.
# safe_shutdown_Pi.py
#
# -----------------------------------------------------------------------------
#                 Raspberry Pi Safe Shutdown Python Script
# -----------------------------------------------------------------------------
# WRITTEN BY: Ho Yun "Bobby" Chan
# @ SparkFun Electronics
# DATE: 3/31/2020
#
# Based on code from the following blog and tutorials:
#
#    Kevin Godden
#    https://www.ridgesolutions.ie/index.php/2013/02/22/raspberry-pi-restart-shutdown-your-pi-from-python-code/
#
#    Pete Lewis
#    https://learn.sparkfun.com/tutorials/raspberry-pi-stand-alone-programmer#resources-and-going-further
#
#    Shawn Hymel
#    https://learn.sparkfun.com/tutorials/python-programming-tutorial-getting-started-with-the-raspberry-pi/experiment-1-digital-input-and-output
#
# ==================== DESCRIPTION ====================
#
# This python script takes advantage of the Qwiic pHat v2.0's
# built-in general purpose button to safely reboot/shutdown you Pi:
#
#    1.) If you press the button momentarily, the Pi will shutdown.
#
# ========== TUTORIAL ==========
#  For more information on running this script on startup,
#  check out the associated tutorial to adjust your "rc.local" file:
#
#        https://learn.sparkfun.com/tutorials/raspberry-pi-safe-reboot-and-shutdown-button
#
# ========== PRODUCTS THAT USE THIS CODE ==========
#
#   Feel like supporting our work? Buy a board from SparkFun!
#
#        Qwiic pHAT v2.0
#        https://www.sparkfun.com/products/15945
#
#   You can also use any button but you would need to wire it up
#   instead of stacking the pHAT on your Pi.
#
# LICENSE: This code is released under the MIT License (http://opensource.org/licenses/MIT)
#
# Distributed as-is; no warranty is given
#
# -----------------------------------------------------------------------------

import time
import RPi.GPIO as GPIO

# Pin definition
shutdown_pin = 17

# Suppress warnings
GPIO.setwarnings(False)

# Use "GPIO" pin numbering
GPIO.setmode(GPIO.BCM)

# Use built-in internal pullup resistor so the pin is not floating
# if using a momentary push button without a resistor.
#GPIO.setup(shutdown_pin, GPIO.IN, pull_up_down=GPIO.PUD_UP)

# Use Qwiic pHAT's pullup resistor so that the pin is not floating
GPIO.setup(shutdown_pin, GPIO.IN)

# modular function to shutdown Pi
def shut_down():
    print("shutting down")
    command = "/usr/bin/sudo /sbin/shutdown -h now"
    import subprocess
    process = subprocess.Popen(command.split(), stdout=subprocess.PIPE)
    output = process.communicate()[0]
    print(output)


# Check button if we want to shutdown the Pi safely
while True:
    #short delay, otherwise this code will take up a lot of the Pi's processing power
    time.sleep(0.5)

    # For troubleshooting, uncomment this line to output buton status on command line
    #print('GPIO state is = ', GPIO.input(shutdown_pin))
    if GPIO.input(shutdown_pin)== False:
        shut_down()
Note: The code is written to use the Qwiic pHAT's pullup resistor. If you are using a momentary pushbutton without a resistor, you can use the built-in internal pullup resistor, so the pin is not floating. Simply uncomment the following line by removing the # from the following line:
#GPIO.setup(shutdown_pin, GPIO.IN, pull_up_down=GPIO.PUD_UP)
And add the # in front of the following line:
GPIO.setup(shutdown_pin, GPIO.IN)
It should look like this after adjusting the code:
.
.
.
# Use built-in internal pullup resistor so the pin is not floating
# if using a momentary push button without a resistor.
GPIO.setup(shutdown_pin, GPIO.IN, pull_up_down=GPIO.PUD_UP)

# Use Qwiic pHAT's pullup resistor so that the pin is not floating
#GPIO.setup(shutdown_pin, GPIO.IN)
Note: The following directions use the text-based terminal to move the Python script since we will be modifying the rc.config file. You can also move the file by dragging the file from the Downloads folder to the /home/pi.
This will be saved in your Downloads folder. Once downloaded, you'll need to move the Python script to the /home/pi. To do that, open the command line. Move to the Downloads folder with the following command.
cd Downloads
We'll use the mv Linux command to move the file to a certain location (in this case /home/pi) with the following command:
mv shutdown_Pi.py /home/pi
Just to make sure that the file was moved correctly, use the change directory command to move back up a level:
cd ..
Followed by the list command to see what's in the path. If you look closely at the images above, it was used to verify what was in the location. You should notice the shutdown_Pi.py file in the location.
ls
Note: If you have not already, we recommend checking out this tutorial on setting up your Raspberry Pi to run a script on startup. We'll be using method 1 to modify the rc.local file for this tutorial.
How to Run a Raspberry Pi Program on Startup
September 18, 2018
In this tutorial, we look at various methods for running a script or program automatically whenever your Raspberry Pi (or other Linux computer) boots up.
With the terminal still open, type the following command:
sudo nano /etc/rc.local
Scroll down using the ↓ button on your keyboard, and just before the exit 0 line, enter the following:
python /home/pi/safe_shutdown_Pi.py &
Save and exit by pressing CTRL + X on your keyboard, followed by y when prompted, and then hit Enter. To ensure that the changes take effect, type the following command.
sudo reboot
After rebooting, hit the GPIO17 button on the Qwiic pHAT v2.0. This should shutdown the Pi. You'll notice the monitor disconnect if you have one attached but make sure to give it a few more seconds to finish shutting down before removing power. The green status LED on the Pi will stop blinking when it is completely shutdown.
You can now safely remove power from the Pi. To power your Pi again, just insert the power connector back into the Pi.
Sweet. But what if you wanted more functionality from just one button? How about we add a condition to distinguish between a momentary button press to reboot or when it is pressed for a certain period of time to shutdown? We can reboot the Pi by switching from the halt (-h) to reboot (-r) command.
sudo shutdown -r now
The following example loads another Python script on startup. The Raspberry Pi will safely reboot or shutdown with the commands depending on how long we press on the button connected to GPIO17.
On your Raspberry Pi, download the Python script by clicking on the button below.
Download "safe_restart_shutdown_Pi.py" here!
You can also copy the code and paste it in a text editor. Just make sure to name this file as safe_restart_shutdown_Pi.py and remember the location that the file was saved.
# safe_restart_shutdown_Pi.py
#
# -----------------------------------------------------------------------------
#                 Raspberry Pi Safe Restart and Shutdown Python Script
# -----------------------------------------------------------------------------
# WRITTEN BY: Ho Yun "Bobby" Chan
# @ SparkFun Electronics
# DATE: 3/31/2020
#
# Based on code from the following blog and tutorials:
#
#    Kevin Godden
#    https://www.ridgesolutions.ie/index.php/2013/02/22/raspberry-pi-restart-shutdown-your-pi-from-python-code/
#
#    Pete Lewis
#    https://learn.sparkfun.com/tutorials/raspberry-pi-stand-alone-programmer#resources-and-going-further
#
#    Shawn Hymel
#    https://learn.sparkfun.com/tutorials/python-programming-tutorial-getting-started-with-the-raspberry-pi/experiment-1-digital-input-and-output
#
# ==================== DESCRIPTION ====================
#
# This python script takes advantage of the Qwiic pHat v2.0's
# built-in general purpose button to safely reboot/shutdown you Pi:
#
#    1.) If you press the button momentarily, the Pi will reboot.
#    2.) Holding down the button for about 3 seconds the Pi will shutdown.
#
# ========== TUTORIAL ==========
#  For more information on running this script on startup,
#  check out the associated tutorial to adjust your "rc.local" file:
#
#        https://learn.sparkfun.com/tutorials/raspberry-pi-safe-reboot-and-shutdown-button
#
# ========== PRODUCTS THAT USE THIS CODE ==========
#
#   Feel like supporting our work? Buy a board from SparkFun!
#
#        Qwiic pHAT v2.0
#        https://www.sparkfun.com/products/15945
#
#   You can also use any button but you would need to wire it up
#   instead of stacking the pHAT on your Pi.
#
# LICENSE: This code is released under the MIT License (http://opensource.org/licenses/MIT)
#
# Distributed as-is; no warranty is given
#
# -----------------------------------------------------------------------------

import time
import RPi.GPIO as GPIO

# Pin definition
reset_shutdown_pin = 17

# Suppress warnings
GPIO.setwarnings(False)

# Use "GPIO" pin numbering
GPIO.setmode(GPIO.BCM)

# Use built-in internal pullup resistor so the pin is not floating
# if using a momentary push button without a resistor.
#GPIO.setup(reset_shutdown_pin, GPIO.IN, pull_up_down=GPIO.PUD_UP)

# Use Qwiic pHAT's pullup resistor so that the pin is not floating
GPIO.setup(reset_shutdown_pin, GPIO.IN)

# modular function to restart Pi
def restart():
    print("restarting Pi")
    command = "/usr/bin/sudo /sbin/shutdown -r now"
    import subprocess
    process = subprocess.Popen(command.split(), stdout=subprocess.PIPE)
    output = process.communicate()[0]
    print(output)

# modular function to shutdown Pi
def shut_down():
    print("shutting down")
    command = "/usr/bin/sudo /sbin/shutdown -h now"
    import subprocess
    process = subprocess.Popen(command.split(), stdout=subprocess.PIPE)
    output = process.communicate()[0]
    print(output)


while True:
    #short delay, otherwise this code will take up a lot of the Pi's processing power
    time.sleep(0.5)

    # For troubleshooting, uncomment this line to output button status on command line
    #print('GPIO state is = ", GPIO.input(reset_shutdown_pin))
    if GPIO.input(reset_shutdown_pin) == False:
        counter = 0

        while GPIO.input(reset_shutdown_pin) == False:
            #For troubleshooting, uncomment this line to view the counter. If it reaches a value above 4, we will restart.
            #print(counter)
            counter += 1
            time.sleep(0.5)

            # long button press
            if counter > 4:
                shut_down()

        #if short button press, restart!
        restart()
Note: The code is written to use the Qwiic pHAT's pullup resistor. If you are using a momentary pushbutton without a resistor, you can use the built-in internal pullup resistor, so the pin is not floating. Simply uncomment the following line by removing the # from the following line:
#GPIO.setup(reset_shutdown_pin, GPIO.IN, pull_up_down=GPIO.PUD_UP)
And add the # in front of the following line:
GPIO.setup(reset_shutdown_pin, GPIO.IN)
It should look like this after adjusting the code:
.
.
.
# Use built-in internal pullup resistor so the pin is not floating
# if using a momentary push button without a resistor.
GPIO.setup(reset_shutdown_pin, GPIO.IN, pull_up_down=GPIO.PUD_UP)

# Use Qwiic pHAT's pullup resistor so that the pin is not floating
#GPIO.setup(reset_shutdown_pin, GPIO.IN)
Note: The following directions use the text-based terminal to move the Python script since we will be modifying the rc.config file. You can also move the file by dragging the file from the Downloads folder to the /home/pi.
This will be saved in your Downloads folder again. Once downloaded, you'll need to move the Python script to the /home/pi. To do that, open the command line. Move to the Downloads folder with the following command.
cd Downloads
We'll use the mv Linux command to move the file with the following command once again:
mv safe_restart_shutdown_Pi.py /home/pi
Just to make sure that the file was moved correctly, use the change directory command to move back up a level:
cd ..
Followed by the list command:
ls
Note: If you have not already, we recommend checking out this tutorial on setting up your Raspberry Pi to run a script on startup. We'll be using method 1 to modify the rc.local file for this tutorial.
How to Run a Raspberry Pi Program on Startup
September 18, 2018
In this tutorial, we look at various methods for running a script or program automatically whenever your Raspberry Pi (or other Linux computer) boots up.
With the terminal still open, type the following command again:
sudo nano /etc/rc.local
Scroll down using the ↓ button on your keyboard, and just before the exit 0 line, adjust the file name for safe_restart_shutdown_Pi.py:
python /home/pi/safe_restart_shutdown_Pi.py &
Save and exit by pressing CTRL + X on your keyboard, followed by y when prompted, and then hit Enter
To ensure that the changes take effect, type the following command.
sudo reboot
After rebooting, hit the GPIO17 button momentarily on the qwiic pHAT v2.0. This should reboot the Pi.
Press and hold GPIO17 button a little longer to initiate the shutdown command. You'll need to give it a few seconds for the Pi to shutdown. You'll notice the monitor disconnect first if you have one attached. At this point, you should be good to remove your finger off the button. Again, you will want to observe the green status LED on the Pi. The LED will stop blinking when the Pi is completely shutdown. You can now safely remove power from the Pi.
There’s always room for improvement. At the time of writing, I didn't realize that the example code used a lot of resources when using it with a Pi 3. While the example code worked, users reported that the code was using a substantial amount of resources when ran. After viewing the CPU usage with the top command on a Pi 4, the code was taking up 90%-100% of the Pi's processing power!
After checking with a co-worker, we agreed that the cause was from the while loop constantly checking the pin's state. Below are two possible solutions to reduce the load on the Pi's CPU.
Adding a Short Delay
Using an Interrupt
One suggestion was to add a small delay. Since a Raspberry Pi will just run the program as fast as it can, the delay prevents it from polling the pin at a high rate in the loop. Adding a simple time.sleep(0.5) in the while loop will free up the Pi's CPU significantly but still allow the code to read the button press to reboot or shutdown the Raspberry Pi.
.
.
.

while True:
    #short delay, otherwise this code will take up a lot of the Pi's processing power
    time.sleep(0.5)

.
.
.
The delay has been implemented in this tutorial's example code for your convenience. If you have already added this example code into an application, simply add the time.sleep(0.5) in the while loop, save the changes, and reboot the Pi for the changes to take effect. Of course, you could make the delay smaller so that the script reacts faster. Note that this will increase the amount of CPU used since you are checking the button state more frequently.
Another suggestion was to adjust the code to use an interrupt to only execute the code when a button is pressed. On your Raspberry Pi, download the Python script by pressing the button below.
Download “safe_shutdown_interrupt_Pi.py” Here (PY)
You can also copy the code and paste it in a text editor. Just make sure to name this file as safe_shutdown_interrupt_Pi.py and remember the location that the file was saved. Then follow the steps outlined above to modify the rc.local file in order to execute the code on startup.
# safe_shutdown_interrupt_Pi.py
#
# -----------------------------------------------------------------------------
#                 Raspberry Pi Safe Shutdown Python Script
# -----------------------------------------------------------------------------
# WRITTEN BY: Ho Yun "Bobby" Chan
# @ SparkFun Electronics
# MODIFIED: 3/18/2021
# DATE: 3/31/2020
#
# Based on code from the following blog and tutorials:
#
#    Kevin Godden
#    https://www.ridgesolutions.ie/index.php/2013/02/22/raspberry-pi-restart-shutdown-your-pi-from-python-code/
#
#    Pete Lewis
#    https://learn.sparkfun.com/tutorials/raspberry-pi-stand-alone-programmer#resources-and-going-further
#
#    Shawn Hymel
#    https://learn.sparkfun.com/tutorials/python-programming-tutorial-getting-started-with-the-raspberry-pi/experiment-1-digital-input-and-output
#
#    Ben Croston raspberry-gpio-python module
#    https://sourceforge.net/p/raspberry-gpio-python/wiki/Inputs/
#
# ==================== DESCRIPTION ====================
#
# This python script takes advantage of the Qwiic pHat v2.0's
# built-in general purpose button to safely shutdown you Pi:
#
#    1.) If you press the button momentarily, the Pi will shutdown.
#
# This example also takes advantage of interrupts so that it uses a negligible
# amount of CPU. This is more efficient since it isn't taking up all of the Pi's
# processing power.
#
# ========== TUTORIAL ==========
#  For more information on running this script on startup,
#  check out the associated tutorial to adjust your "rc.local" file:
#
#        https://learn.sparkfun.com/tutorials/raspberry-pi-safe-reboot-and-shutdown-button
#
# ========== PRODUCTS THAT USE THIS CODE ==========
#
#   Feel like supporting our work? Buy a board from SparkFun!
#
#        Qwiic pHAT v2.0
#        https://www.sparkfun.com/products/15945
#
#   You can also use any button but you would need to wire it up
#   instead of stacking the pHAT on your Pi.
#
# LICENSE: This code is released under the MIT License (http://opensource.org/licenses/MIT)
#
# Distributed as-is; no warranty is given
#
# -----------------------------------------------------------------------------

import time
import RPi.GPIO as GPIO #Python Package Reference: https://pypi.org/project/RPi.GPIO/

# Pin definition
shutdown_pin = 17

# Suppress warnings
GPIO.setwarnings(False)

# Use "GPIO" pin numbering
GPIO.setmode(GPIO.BCM)

# Use built-in internal pullup resistor so the pin is not floating
# if using a momentary push button without a resistor.
#GPIO.setup(shutdown_pin, GPIO.IN, pull_up_down=GPIO.PUD_UP)

# Use Qwiic pHAT's pullup resistor so that the pin is not floating
GPIO.setup(shutdown_pin, GPIO.IN)

# modular function to shutdown Pi
def shut_down():
    print("shutting down")
    command = "/usr/bin/sudo /sbin/shutdown -h now"
    import subprocess
    process = subprocess.Popen(command.split(), stdout=subprocess.PIPE)
    output = process.communicate()[0]
    print(output)


while True:
    #short delay, otherwise this code will take up a lot of the Pi's processing power
    time.sleep(0.5)

    # wait for a button press with switch debounce on the falling edge so that this script
    # is not taking up too many resources in order to shutdown the Pi safely
    channel = GPIO.wait_for_edge(shutdown_pin, GPIO.FALLING, bouncetime=200)

    if channel is None:
        print('Timeout occurred')
    else:
        print('Edge detected on channel', channel)

        # For troubleshooting, uncomment this line to output button status on command line
        #print('GPIO state is = ', GPIO.input(shutdown_pin))
        shut_down()
By using the GPIO.wait_for_edge() we can free up the CPU since the code waits for a rising or falling edge of a button press. In this case, we look for a falling edge on pin 17. If there is a button press, we will use the commands to shutdown the Pi like we did in the first example.
As explained in the previous section, the other option besides using a delay is to adjust the code to use an interrupt to only execute the code when a button is pressed. On your Raspberry Pi, download the Python script by pressing the button below.
Download "safe_restart_shutdown_interrupt_Pi.py" Here (PY)
You can also copy the code and paste it in a text editor. Just make sure to name this file as safe_restart_shutdown_interrupt_Pi.py and remember the location that the file was saved. Then follow the steps outlined above to modify the rc.local file in order to execute the code on startup.
# safe_restart_shutdown_interrupt_Pi.py
#
# -----------------------------------------------------------------------------
#                 Raspberry Pi Safe Restart and Shutdown Python Script
# -----------------------------------------------------------------------------
# WRITTEN BY: Ho Yun "Bobby" Chan
# @ SparkFun Electronics
# MODIFIED: 3/18/2021
# DATE: 3/31/2020
#
#
# Based on code from the following blog and tutorials:
#
#    Kevin Godden
#    https://www.ridgesolutions.ie/index.php/2013/02/22/raspberry-pi-restart-shutdown-your-pi-from-python-code/
#
#    Pete Lewis
#    https://learn.sparkfun.com/tutorials/raspberry-pi-stand-alone-programmer#resources-and-going-further
#
#    Shawn Hymel
#    https://learn.sparkfun.com/tutorials/python-programming-tutorial-getting-started-with-the-raspberry-pi/experiment-1-digital-input-and-output
#
#    Ben Croston raspberry-gpio-python module
#    https://sourceforge.net/p/raspberry-gpio-python/wiki/Inputs/
#
# ==================== DESCRIPTION ====================
#
# This python script takes advantage of the Qwiic pHat v2.0's
# built-in general purpose button to safely reboot/shutdown you Pi:
#
#    1.) If you press the button momentarily, the Pi will reboot.
#    2.) Holding down the button for about 3 seconds the Pi will shutdown.
#
# This example also takes advantage of interrupts so that it uses a negligible
# amount of CPU. This is more efficient since it isn't taking up all of the Pi's
# processing power.
#
# ========== TUTORIAL ==========
#  For more information on running this script on startup,
#  check out the associated tutorial to adjust your "rc.local" file:
#
#        https://learn.sparkfun.com/tutorials/raspberry-pi-safe-reboot-and-shutdown-button
#
# ========== PRODUCTS THAT USE THIS CODE ==========
#
#   Feel like supporting our work? Buy a board from SparkFun!
#
#        Qwiic pHAT v2.0
#        https://www.sparkfun.com/products/15945
#
#   You can also use any button but you would need to wire it up
#   instead of stacking the pHAT on your Pi.
#
# LICENSE: This code is released under the MIT License (http://opensource.org/licenses/MIT)
#
# Distributed as-is; no warranty is given
#
# -----------------------------------------------------------------------------

import time
import RPi.GPIO as GPIO #Python Package Reference: https://pypi.org/project/RPi.GPIO/

# Pin definition
reset_shutdown_pin = 17

# Suppress warnings
GPIO.setwarnings(False)

# Use "GPIO" pin numbering
GPIO.setmode(GPIO.BCM)

# Use built-in internal pullup resistor so the pin is not floating
# if using a momentary push button without a resistor.
#GPIO.setup(reset_shutdown_pin, GPIO.IN, pull_up_down=GPIO.PUD_UP)

# Use Qwiic pHAT's pullup resistor so that the pin is not floating
GPIO.setup(reset_shutdown_pin, GPIO.IN)

# modular function to restart Pi
def restart():
    print("restarting Pi")
    command = "/usr/bin/sudo /sbin/shutdown -r now"
    import subprocess
    process = subprocess.Popen(command.split(), stdout=subprocess.PIPE)
    output = process.communicate()[0]
    print(output)

# modular function to shutdown Pi
def shut_down():
    print("shutting down")
    command = "/usr/bin/sudo /sbin/shutdown -h now"
    import subprocess
    process = subprocess.Popen(command.split(), stdout=subprocess.PIPE)
    output = process.communicate()[0]
    print(output)


while True:
    #short delay, otherwise this code will take up a lot of the Pi's processing power
    time.sleep(0.5)

    # wait for a button press with switch debounce on the falling edge so that this script
    # is not taking up too many resources in order to shutdown/reboot the Pi safely
    channel = GPIO.wait_for_edge(reset_shutdown_pin, GPIO.FALLING, bouncetime=200)

    if channel is None:
        print('Timeout occurred')
    else:
        print('Edge detected on channel', channel)

        # For troubleshooting, uncomment this line to output button status on command line
        #print('GPIO state is = ', GPIO.input(reset_shutdown_pin))
        counter = 0

        while GPIO.input(reset_shutdown_pin) == False:
            # For troubleshooting, uncomment this line to view the counter. If it reaches a value above 4, we will restart.
            #print(counter)
            counter += 1
            time.sleep(0.5)

            # long button press
            if counter > 4:
                shut_down()

        #if short button press, restart!
        restart()
We use the GPIO.wait_for_edge() once again and look for a falling edge on pin 17. If there is a button press, we will use the commands to either reboot or shutdown the Pi like we did in the second example. Since the button will continue to be pressed down, its state does not change. We will check to see how long the button is pressed. For short button presses, the Pi will restart. For long presses after the counter reaches a value above 4, the Pi will shutdown.
So how effective is adding a short delay vs an interrupt? Adding a short delay reduced the amount of processing used by the CPU significantly to about 0.3%.
Adding an interrupt also reduced the amount of processing used by the CPU significantly. The script stopped using the CPU once it reached the line with GPIO.wait_for_edge(). After using top in the command line, the process needed to be searched with the L command followed by entering word python since it was not shown near the top of the list.
While adding a short delay is a quick fix, it was slow to react and was wasted some of the Pi's processing as it kept checking the button state. Adding an interrupt was not as simple but it was faster to react and more efficient since it was not wasting any of the Pi's processing as it waited for the falling edge of the button. Overall, I'd say using interrupts is better but if you are in a rush to write code, adding a delay would be the alternative option.
For more resources, check out the links below:
eLinux.org Wiki: Wake from Halt - For certain versions, you can wake the Pi up by shorting pins together rather than disconnecting the power supply. However, caution is advised as these GPIO pins are adjacent to the power pins. You would want to solder a button to the pins to avoid accidentally shorting the power pins.